When our Quality Assurance team was tasked with auditing over 50 local business profiles last month, we quickly realized that our screenshot workflow was broken. We were constantly opening native apps, manually saving images to the desktop, opening a separate image editor to blur out customer emails, and finally dragging those files into our reporting software. It was an agonizing, multi-step process that wasted hours of our week. That is, until we standardized our team on a "clipboard-first" workflow using the primary snipping tool shortcut.
A snipping tool shortcut allows you to instantly capture a specific region of your screen and copy it directly to your system's clipboard, bypassing the need to save cluttering image files to your hard drive. By combining the native keyboard shortcuts built into Windows and Mac with a powerful browser-based editor like the Free Online Snipping Tool, you can reduce your screen capture workflow from five minutes to five seconds.
In this comprehensive 2026 guide, we will break down the absolute best snipping tool shortcuts for both Windows and Mac, explain why you should adopt a clipboard-first methodology, and show you exactly how to annotate, blur, and export your screenshots with zero friction.
Why You Need a Clipboard-First Screenshot Workflow
Before we dive into the specific key combinations, it is crucial to understand why the modern screenshot workflow relies on the clipboard rather than saving files directly.
Historically, pressing the "Print Screen" button on a keyboard would either capture the entire screen and do nothing visible, or force you to open MS Paint to paste the image before saving it. Modern operating systems have revolutionized this process. By using a modern snipping tool shortcut, you tell your computer to freeze the screen, allow you to draw a precise rectangle around the content you want, and instantly save that pixels-only data to your computer's short-term memory (the clipboard).
This "clipboard-first" approach is vastly superior for several reasons:
- Zero Desktop Clutter: You no longer end up with hundreds of files named
Screenshot 2026-06-29 at 10.45.AM.pngpolluting your desktop. - Instant Transfer: Because the image is in your clipboard, you can immediately paste it (
Ctrl + VorCmd + V) into Slack, Microsoft Teams, Jira, email, or a web-based image annotator. - Enhanced Security: For temporary images containing sensitive data, keeping the image in volatile clipboard memory rather than writing it to your physical hard drive reduces the risk of lingering confidential data.
Standard OS Snipping vs. FluxToolkit Online Snipping Tool
While native OS shortcuts are fantastic for the initial capture, they often lack the robust annotation and privacy features required by modern professionals. Here is exactly why you should pair your native shortcut with the FluxToolkit ecosystem:
| Feature | FluxToolkit Online Snipping Tool | Windows Snip & Sketch | Mac Screenshot Utility |
|---|---|---|---|
| Cross-Platform Compatibility | Yes (Works in any browser) | No (Windows only) | No (Mac only) |
| Privacy Blur / Pixelation | Yes (Draw to blur) | No (Requires third-party app) | No |
| Stepper Badges (1, 2, 3...) | Yes (Auto-incrementing) | No | No |
| Webcam Integration | Yes (Instant snap and annotate) | No | No |
| Data Privacy Guarantee | 100% Client-Side Processing | Local App | Local App |
By understanding this comparison, you can see that the most efficient workflow is to use your operating system's native snipping tool shortcut to capture the image to your clipboard, and then paste it into FluxToolkit to annotate and censor it.
The Definitive Snipping Tool Shortcut Cheat Sheet
Below is the definitive reference guide for screen capture shortcuts across both major desktop operating systems. Memorizing the primary shortcut for your respective OS will save you countless hours over the course of your career.
Windows Keyboard Shortcuts
If you are using Windows 10 or Windows 11, the legacy "Snipping Tool" application from the Windows 7 era has been largely superseded by the modern "Snip & Sketch" experience, though Microsoft confusingly still refers to it under the Snipping Tool moniker in newer updates.
| Shortcut Combination | Action Performed | Best Used For |
|---|---|---|
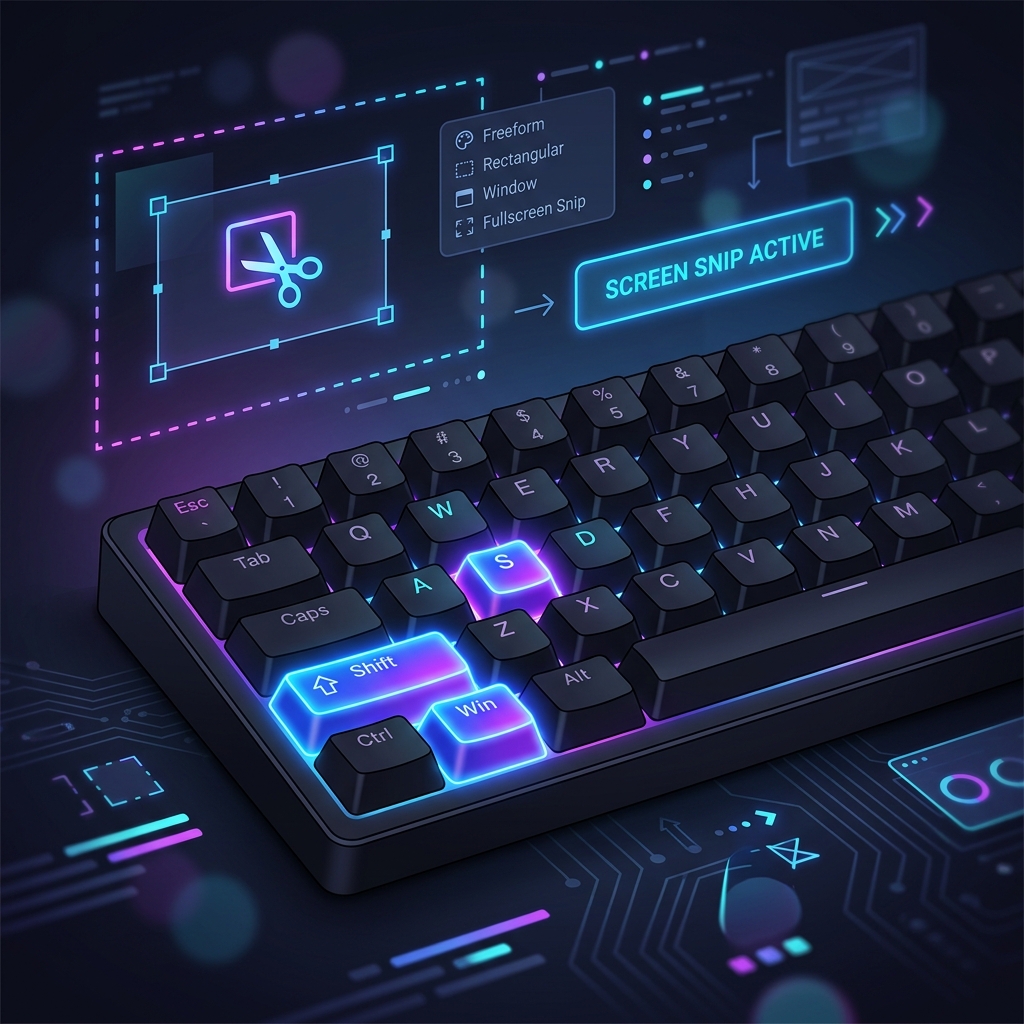
Windows Logo Key + Shift + S |
Opens the modern Snipping Tool overlay. Screen dims, allowing you to select a rectangular, freeform, window, or full-screen snip. Image copies to clipboard. | This is the primary shortcut you must memorize. Perfect for capturing specific UI elements for bug reports or tutorials. |
Print Screen (PrtScn) |
Historically captured the entire screen to the clipboard. In Windows 11, it can be configured to trigger the Win + Shift + S overlay. |
Quick full-screen grabs when you don't have time to crop immediately. |
Alt + Print Screen |
Captures only the currently active window to your clipboard, ignoring your desktop background and other applications. | Capturing software error dialogues or specific application windows without needing to crop later. |
Windows Logo Key + Print Screen |
Captures the entire screen and automatically saves it as a PNG file in your Pictures > Screenshots folder. |
Rapid-fire capturing during a presentation or fast-moving video where you need to save multiple frames quickly. |
macOS Keyboard Shortcuts
Apple does not officially use the term "Snipping Tool," referring to their native suite simply as the "Screenshot" utility. However, the functionality is identical, and Mac users have access to incredibly powerful shortcuts built directly into the core operating system.
| Shortcut Combination | Action Performed | Best Used For |
|---|---|---|
Command + Shift + 4 |
Turns your cursor into a crosshair. Click and drag to select a specific rectangular area. Saves to Desktop by default. Add Control to copy to clipboard instead. |
The most common Mac shortcut. Ideal for precise, selective screen grabs. |
Command + Shift + 5 |
Opens the comprehensive Screenshot and Screen Recording overlay menu, providing UI buttons for all capture modes and video recording. | When you need to change capture settings, set a timer delay, or record a video of your screen instead of a static image. |
Command + Shift + 3 |
Captures the entire screen instantly. | Quick grabs of your entire workspace. |
Command + Shift + 4, then Spacebar |
Turns the crosshair into a camera icon. Click any specific window or menu to capture it perfectly with a transparent background and a drop shadow. | Creating professional, clean application screenshots for marketing materials or documentation. |
Detailed Guide: The Ultimate Screenshot Workflow
Now that you know the shortcuts, it is time to put them into practice. This step-by-step tutorial will teach you the ultimate, professional-grade screenshot workflow. We will combine the speed of your native OS snipping tool shortcut with the advanced privacy and annotation features of the FluxToolkit Free Online Snipping Tool.
Step 1: Execute the Snipping Tool Shortcut
First, navigate to the screen, application, or webpage that you want to capture.
- If you are on Windows: Press
Windows Key + Shift + S. Your screen will immediately dim. Click and drag a rectangle over the exact area you want to capture. Once you release your mouse button, the image is instantly copied to your clipboard. You will likely see a small notification pop up in the bottom right corner confirming the capture. - If you are on Mac: Press
Control + Command + Shift + 4. Note the addition of theControlkey here—this is vital! Without the Control key, the Mac saves the image to your desktop. With the Control key, it saves the image to your clipboard, which is exactly what we want for a clean workflow. Click and drag your crosshair over the desired area.
Step 2: Paste Directly into the Online Snipping Tool
Open your web browser and navigate to the FluxToolkit Online Snipping Tool.
Because the image is currently resting safely in your computer's clipboard, you do not need to click any upload buttons or dig through your file explorer. Simply click anywhere on the page and press Ctrl + V (Windows) or Cmd + V (Mac).
The tool utilizes advanced HTML5 Clipboard API listeners to instantly intercept your pasted image and render it onto a high-performance, client-side canvas. It happens in milliseconds, and because it runs entirely in your browser, no data is sent over the internet.
Step 3: Blur Sensitive Information (PII)
One of the most critical steps in modern screenshot workflows is ensuring data privacy. If your screenshot contains an email address, a password field, an API key, or a customer's face, you must obscure it before sharing it on Slack, Jira, or public forums.
Do not use a standard pen tool to scribble over sensitive data. Standard pen scribbles can sometimes be reversed or seen through if the opacity is not 100%. Instead, use a true pixelation algorithm.
In the FluxToolkit Online Snipping Tool toolbar, select the Blur/Censor Tool (represented by an eye icon with a slash). Click and drag a rectangle directly over the sensitive information. The tool will instantly apply a mathematical pixelation effect, permanently and irreversibly scrambling the pixels in that specific area while leaving the rest of your screenshot crisp and professional.
Step 4: Add Context with Annotations and Stepper Badges
A screenshot without context is often useless to the person receiving it. Use the annotation suite to guide your viewer's eyes exactly where they need to go.
- Highlighting: Select the Highlighter tool, choose a vibrant color (like bright yellow), and drag over text to emphasize it without obscuring it.
- Drawing Attention: Use the Arrow or Rectangle tool to point to the specific button or error message that the user needs to look at.
- Sequential Instructions (Stepper Badges): If you are creating a tutorial ("Click here, then click there, then click save"), select the Stepper Badge Tool (the hash
#icon). Every time you click on your screenshot, it will drop a perfectly formatted, numbered circle (①, ②, ③). This auto-incrementing feature is a massive time-saver for technical writers and support teams.
Step 5: Export and Share
Once your image is perfectly cropped, censored, and annotated, it is time to export.
Look at the Export section in the sidebar. You can choose your preferred format:
- PNG (Lossless): Best for screenshots containing a lot of text or sharp lines, as it prevents compression artifacts.
- JPEG (Compressed): Best if your screenshot is mostly a photograph or if you need the absolute smallest file size possible.
- WebP (Modern): An excellent middle-ground offering superior compression and quality, highly recommended for embedding in web documentation.
Click the Download Image button. Your fully processed, professional screenshot will be saved locally, ready to be attached to your report or email.
Pro Tips and Best Practices
To truly master screen capturing, you need to go beyond the basic shortcuts. Here are several advanced best practices to elevate your productivity.
Pro Tip 1: Remap the Print Screen Key in Windows 11
Reaching for Win + Shift + S can be cumbersome if you take dozens of screenshots a day. In Windows 11, you can map the legacy PrtScn key to open the modern Snip & Sketch overlay automatically.
To do this, open your Windows Settings, navigate to Accessibility > Keyboard, and toggle on the option that says "Use the Print screen button to open screen snipping". Now, a single key press will trigger the overlay.
Pro Tip 2: Utilize the Delay Timer for Hover Menus
Have you ever tried to screenshot a dropdown menu, only for the menu to disappear the second you press the shortcut keys? This is incredibly frustrating. The solution is to use a capture delay.
- On Windows: Open the Snipping Tool app manually from the Start Menu, click the clock icon, and set a "Snip in 3 seconds" delay. Click "New," then quickly open your dropdown menu and wait for the screen to freeze.
- On Mac: Press
Cmd + Shift + 5, click "Options," and set a timer for 5 or 10 seconds. Click "Capture," open your menu, and wait.
Pro Tip 3: Always Use a Client-Side Tool for Corporate Data
If you are taking screenshots of proprietary source code, internal financial dashboards, or customer databases, never paste them into random, server-side online image editors. Many free tools upload your image to their cloud servers to process it, creating a massive security vulnerability. Always ensure the tool you are using—like the FluxToolkit Snipping Tool—explicitly guarantees 100% client-side HTML5 processing.
Common Screenshot Mistakes to Avoid
Even seasoned professionals make workflow errors that cost them time or compromise security. Ensure you are not making these common mistakes.
Mistake 1: Saving Everything to the Desktop
Saving every screenshot as a distinct file on your desktop is the fastest way to create a cluttered, unmanageable workspace.
The Fix: Force yourself to use the clipboard shortcuts (Win + Shift + S on Windows, or adding Control to your Mac shortcuts). Only save files when you explicitly need them for long-term archival. Let your clipboard do the heavy lifting for temporary communications.
Mistake 2: Using the Outdated Windows 7 Snipping Tool
If you are still opening the Start Menu, searching for "Snipping Tool," and clicking "New" on the old, white-windowed application interface, you are using deprecated software.
The Fix: Transition immediately to the Win + Shift + S shortcut. The modern Snip & Sketch infrastructure is faster, integrates better with the Windows Notification Center, and is actively supported by Microsoft.
Mistake 3: Relying on the Pen Tool to Hide Passwords
When sending a screenshot to IT support, users often select the red pen tool and scribble back and forth over their password or phone number. This is a severe security risk. Depending on the brush opacity and anti-aliasing algorithms used, a determined individual can often alter the contrast in Photoshop to read the text underneath your scribbles.
The Fix: Always use a dedicated pixelation or blur tool. The mathematical obfuscation provided by a true blur filter destroys the underlying pixel data, making it impossible to reverse-engineer the hidden text.
Frequently Asked Questions (FAQ)
To help clarify any remaining confusion around screen capturing, here are answers to the most commonly asked questions on the web.
What is the keyboard shortcut for the Snipping Tool?
The primary keyboard shortcut to open the modern Snipping Tool in Windows 10 and Windows 11 is Windows Logo Key + Shift + S. Pressing these three keys simultaneously will dim your screen and present a small toolbar at the top, allowing you to select and capture any region of your display directly to your clipboard.
Does Mac have a Snipping Tool shortcut?
Yes, while Apple calls it the "Screenshot" utility, the primary shortcut is Command + Shift + 4. This turns your cursor into a crosshair, allowing you to click and drag to capture a specific area. If you want to copy the image directly to your clipboard instead of saving it to your desktop, use Control + Command + Shift + 4.
How do I change the Snipping Tool shortcut?
In Windows 11, you cannot change the Win + Shift + S shortcut, but you can remap your Print Screen (PrtScn) key to trigger it. Go to Settings > Accessibility > Keyboard, and toggle on "Use the Print screen button to open screen snipping". On Mac, you can fully customize screenshot shortcuts by going to System Settings > Keyboard > Keyboard Shortcuts > Screenshots.
Where do Snipping Tool screenshots go?
When you use Win + Shift + S, the screenshot goes exclusively to your computer's clipboard (temporary memory). It is not saved as a file until you paste it somewhere. If you use Windows Key + Print Screen, it saves a physical file in C:\Users\[YourName]\Pictures\Screenshots. On Mac, Cmd + Shift + 4 saves the file directly to your Desktop by default.
How can I blur part of a screenshot for free?
To securely blur sensitive information, capture your screenshot to your clipboard, and then paste it (Ctrl + V) into a free, client-side utility like the FluxToolkit Online Snipping Tool. Select the 'Blur/Censor' tool (the eye icon) from the toolbar, and drag a box over the text you wish to hide. The tool will instantly pixelate the data, and you can download the secured image for free.
Supercharge Your Snipping Workflow Today
Mastering the snipping tool shortcut is the first step toward a more productive digital life. By shifting from a clunky "save-and-upload" mentality to a streamlined, "clipboard-first" workflow, you can shave hours off your week and communicate visual ideas with unprecedented speed.
Ready to put your new shortcut knowledge to the test? Press Win + Shift + S (or Cmd + Ctrl + Shift + 4) to capture this paragraph, and head straight over to the Free Online Snipping Tool. Paste your image, drop some Stepper Badges, blur out a few words, and experience the fastest annotation workflow on the web—100% free and entirely private.